Not long ago, I started this blog. I already wrote a post on how I researched CMSs and landed on using the Grav CMS for my own needs. But I would like to dig into this a bit deeper. With each passing day that I learn something new in this CMS, the more I love it.
CONTENT HERE
Grav is easy to setup. While there are not as many hosting options out there for Grav as there are for WordPress, for example, there are more than a few.
That said, when I say Grav is easy to setup, I mean that it is easy to self-host a Grav CMS site. If you know how to configure/manage a webserver–whether Apache, NGINX, IIS, or something else–and have it use PHP, that is all it should take.
Once you have your webserver configured for basic PHP use, and you have a root/home directory that the webserver will serve, it is mostly a case of
Download Grav as a .zip file (I recommend “Grav Core + Admin plugin” right from their download page.)
Decompress the .zip file so that the files/folders are in your web root.
Adjust any file ownership / permissions as needed.
For Apache/NGINX on *nix, you typically set the ownership of website files/folders to match the user that the webserver runs as. For example, if running NGINX on Ubuntu, this is typically user/group www-data, so you might use a command like sudo chown -R www-data:www-data /var/www/ if the web root was /var/www.
Point your browser at the site’s URL. Done!
From here you just do as the pages indicate. Grav will check if you have all the necessary PHP modules installed, telling you if something is missing. If all is right with the world, you will be taken to a page where you enter your admin credentials to get started. Easy peasy.
Much like a crack dealer, let me give you just a taste. If you have a Mac or are using a Linux or Windows system that has PHP 7.3.6 or newer installed, here is a way to see if Grav is right for you. And you do not even need a webserver!
For this I will assume that your desktop is located at /Users/You/Desktop. Adjust accordingly.
Download Grav Core + Admin plugin .zip file from here to your desktop.
Decompress the .zip file. It should create a directory on your desktop named grav-admin.
Open up a Terminal/Command Prompt/shell and navigate to /Users/You/Desktop/grav-admin.
Run the command php -S 127.0.0.1:8000 system/router.php. (This says to run the PHP as a webserver listening on port 8000 on your loopback interface. Adjust as needed.)
Point your browser at http://127.0.0.1:8000
If you are on a macOS system, odds are you will see an error similar to the following:
initial_test_error
This is due to the fact that the built-in version of PHP on macOS lacks the ZIP extension. (Note that Grav does not simply error out. It tells you exactly what is missing.) For testing purposes ONLY, you can get around this issue by creating the file /Users/You/Desktop/grav-admin/user/config/plugins/problems.yaml (you may need to create the plugins directory as well) and putting the following content into that file:
enabled:falsebuilt_in_css:true
Then reload the page. What this does is tell Grav to ignore problems like this and continue anyway.
But note you are running a version of PHP which does not support ZIP. Since themes, plugins, backups, and likely other pieces rely on .ZIP files, this means you will not be able to tinker with adding themes or plugins, nor doing backups, in this case. But again, this is purely a taste after all. 😀 (Do NOT run Grav in production this way!)
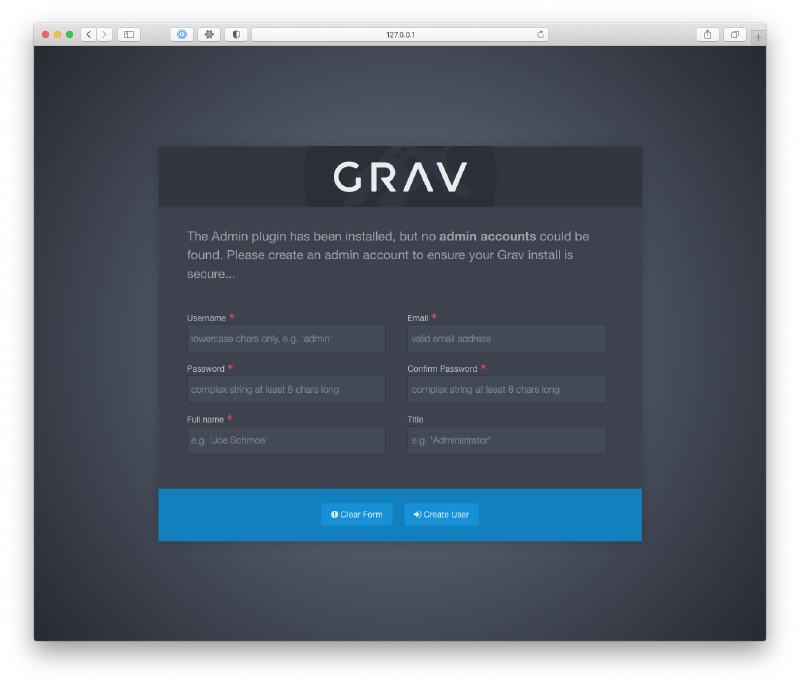
If all goes well, you should now be presented with a webpage similar to this:
admin_account_creation
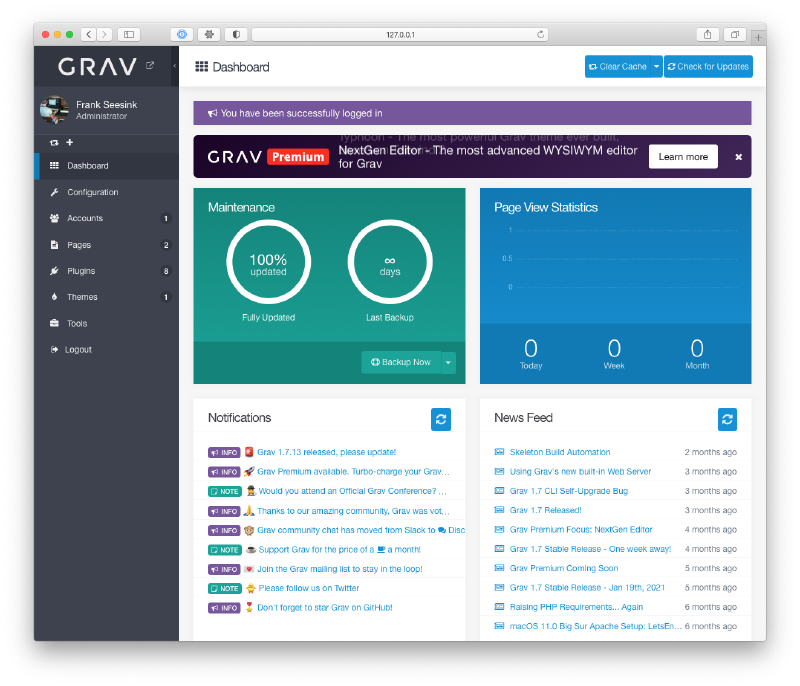
7. Fill in this page, making sure to follow the password guidelines (hover your mouse over the password field for info). And if everything goes well, you will finally be presented with the Admin panel:
admin_panel_dashboard NOTE: That image in the upper left corner is because I have a Gravatar and the email I used to create the admin account is tied to that Gravatar. YMMV.
If you are a GUI-oriented person and installed the “Grav Core + Admin plugin”, you can do just about everything from the Admin panel on the website. Point your browser at <siteurl>/admin, login, and go.
(To date, using the Admin panel is currently how I have been managing this site. I have intentionally chosen to only do those things that I can do from the Admin panel, as I want to see where the limitations lie. So far? I have not really run into any. At most, I have had to switch to Expert mode in the editor to adjust some header/frontmatter for a page.)
If you are more of a CLI jockey, Grav’s underlying structure is such that you could manage your entire site from a shell quite easily. In such a case, you could simply install the Grav Core and skip the Admin plugin altogether.
In fact, Grav offers a utility called gpm which lets you do at the CLI what you do in the Admin panel. Think of it like rpm for RHEL/CENTOS distros, apt for Debian/Ubuntu distros, or pip for Python. You can install/update/remove/activate/deactivate plugins and themes. And most config management tasks are a simple case of editing a YAML file in the text editor of your choice.
One thing to note is that Grav comes with a full set of presets that it stores in the ./system directory. For example, most default site config is in ./system/config. These files should not be touched. They are your baseline. If you wish to change anything, you do so in an identically named file under ./user. So if you wanted to change something that you see in ./system/config/site.yaml, you would do so by putting the delta changes from the default in ./user/config/site.yaml. Grav will use the default settings, except where you have overridden them in your ./user/ files. (The Admin panel, by the way, does all this for you.)
If you prefer doing all your work via Git like a DevOps person, you could also manage it using a Git repository.
Now you can do this in usual raw CLI fashion, or you can leverage the Git Sync plugin for the Admin panel. The latter lets you sync with a single click to a GitHub repo, and even has a webhook so that when a change occurs on GitHub (e.g., you pushed a page change to your GitHub repo from your laptop), it gets automatically pulled in by Grav! And yes, it works like a charm.
Or you can go crazy and use all of the above!
Again, I can verify this, as I currently have my Grav site configured with the Git Sync plugin that syncs the site to a private GitHub repository. Not only that, but I have the webhook in place so that any change to the GitHub repo results in Grav doing a pull. So I can update things however I like. That is, I can update a page using the editor in the web UI and push those changes to the GitHub repo with a single click. Or I can SSH into my server and edit a page there. Or I can pull the git repo to my desktop, edit a file, push my changes, and voila! Grav will show the updates. It truly is very flexible.
Getting started with Grav is easy, especially if all you want to do is a basic website or simple blog. One guide I found helpful when I started was this one.
Now once you get past the basics, there is much more to Grav to explore. Grav is far more powerful the more you dig into it. First and foremost, the Grav documentation is excellent. So any time you have questions/concerns, you always have the authoritative docs to turn to.
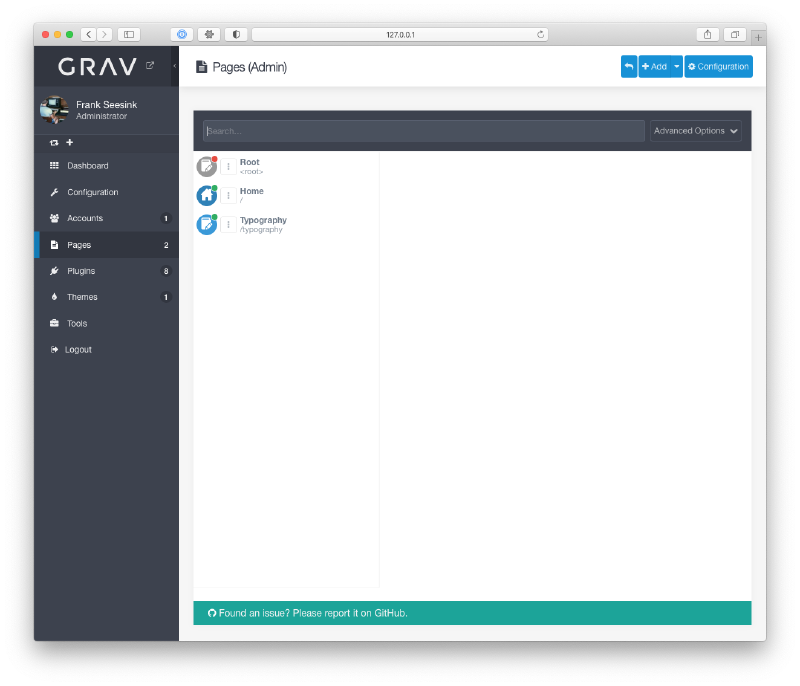
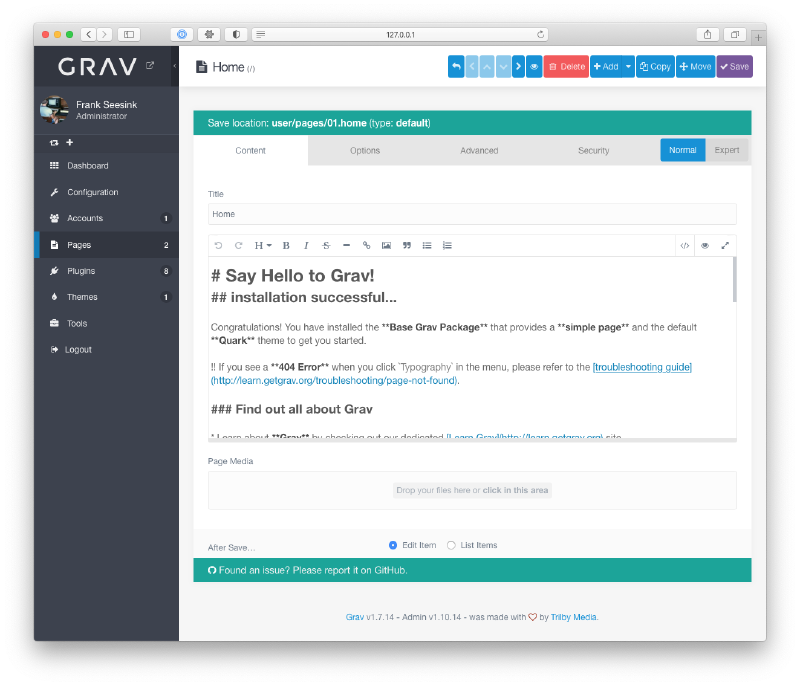
Creating a single page/post in Grav is quite easy. From the Admin panel, navigate to the Pages section, click [+Add], fill in the relevant info, click [Continue], and then you use the pseudo-WYSIWYG editor with handy toolbar to write your content, preview it, save it, and publish it.
admin_panel_pages_home_content
(For those familiar with WordPress, for example, things work a little different in Grav. You specify whether the page is published or not in the Options tab. And by default, it is set to published. So if you are working on a draft, be sure to change that before saving the page.)
You can also click the down arrow to the right of the [+Add] button to create a folder or a module. I will not go into details here, but just note Grav has this concept of modular pages, and modules are the pieces that make up a modular page. For those who have seen your typical WordPress site, where as you scroll down you see different content types, module pages basically achieve this in Grav.
One of the key aspects I liked about Grav is that you can type in your content using simple Markdown syntax. That is not to say you are limited to Markdown. Just that the content could be nothing more than simple Markdown text, which Grav then takes care to render into HTML.
Other options include writing raw HTML content where needed. Or if you need something more, you can leverage Twig. If you are familiar with Python, think of Twig as rather similar to Jinja2.
Another aspect I like is that each page in a Grav site is stored in its own directory/folder. The directory is named for the page you create (e.g., the home page would be stored in 01.home. (The numbering has to do with the navigation system ordering. All you need to understand is that if you use the Admin panel, it will handle all this for you. If you are a CLI jockey, then you control the navigation order/etc. simply by changing directory names.)
When you are editing the content of a page, that information is stored in a text file ending in .md in that page’s folder. If you do not change anything, that file is named default.md, because the default template for a page is Default. If in the Admin panel you change the template for the page (e.g., you change it to Blog Item), then you will find this file has been renamed blog_item.md. (For the CLI jockeys, just as you control navigation by changing directory names, you can control template usage by changing this filename.)
If you use the Admin panel, you can easily drag/drop image files into the Page Media section at the bottom of the page. This uploads the image files into the same directory as the page’s content file. So if you drag/drop the file myface.jpg into the Page Media section, at this point the directory structure of this page would look like this:
This is nice because it means that any time you want to see the content of your pages, all you need to do is access the directory of a page with an editor that supports Markdown (e.g., VSCode). I have confirmed this by downloading my site, then opening such a page in VSCode. It renders as you would expect.
Quick note: The example above is just that. Do not use it per se. Your home page is not likely going to use the Blog Item template. And speaking of blogs, if your intention is to build a blog, the usual way to do this is to create a page named blog at the root level of your site, and set that page to use the Blog List page template. Then for each blog post, you simply create a page that you locate underneath that blog page, and you specify that the post uses the Blog Item page template. Grav will take it from there. If you visit yoursite/blog, you will see a page that lists your blog posts, sorted by default in reverse chronological order (newest posts at the top). If you specified using a Blog Item summary image, you’ll see that, too. (There is far more to cover here, but it should be enough to get you started.)
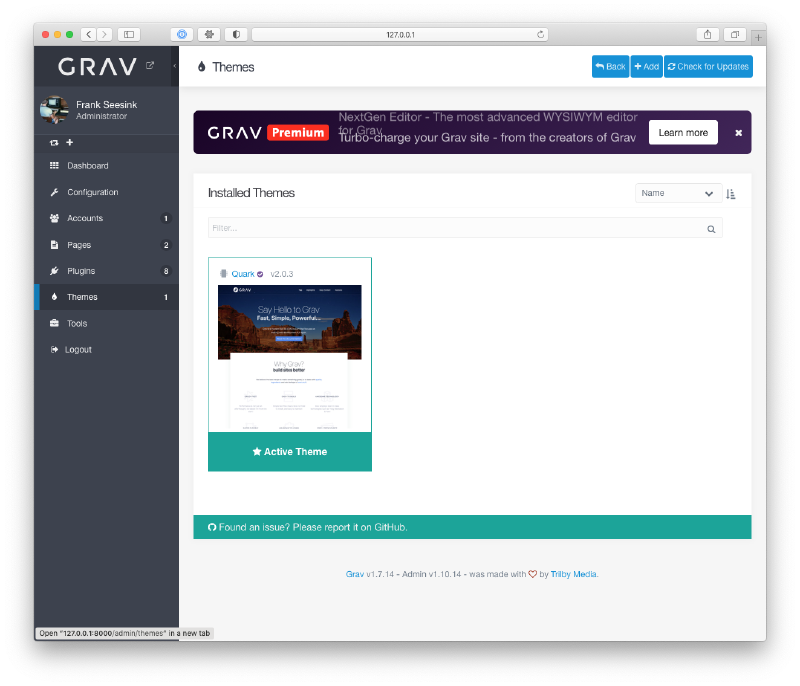
Like many CMSs, Grav offers themes which let you quickly change the look and feel of your site. Themes consist of templates (which determine page layout) along with CSS (which handles fonts, foreground/background colors, etc.). Grav follows the concept of separating content from layout. (For programmers, think the Model-View-Controller, or MVC, approach.) Your various pages’ contents are stored separately from the themes/templates used to display them. This allows you to quickly change your site’s theme and have the entire site change.
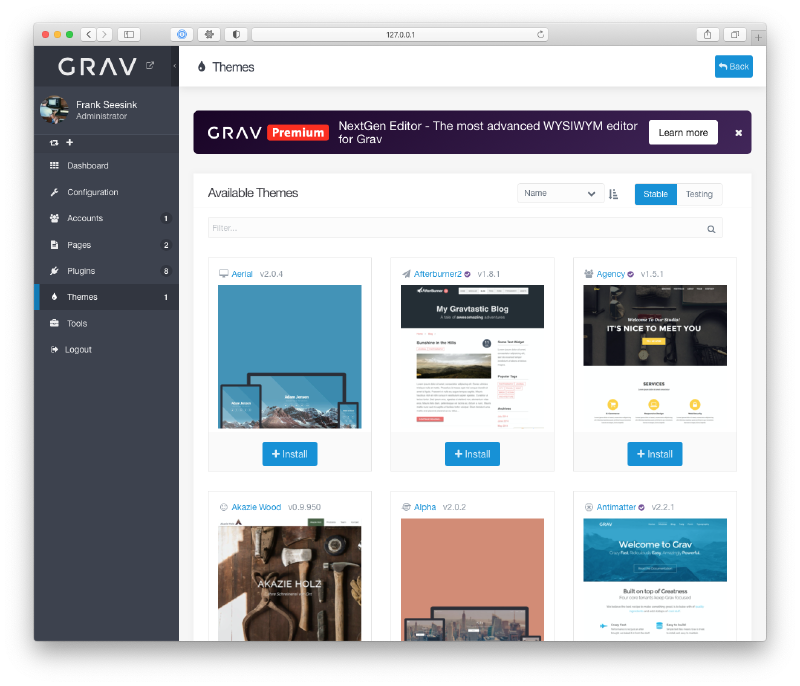
There is a lot to unpack here. Suffice it to say that if you are more of a GUI type, you can do pretty much everything you need to regarding themes right in the Admin panel. There is a section for Themes where you can see which ones are currently installed, activate one of the installed themes, and click an [+Add] button and be taken to a whole list of available themes online that you can download into your site.
Beyond basic content and the look and layout of your site, there is the plugin system. With plugins, you can add all kinds of functionality to your site. Plugins are written in PHP, and it is how you add capabilities to Grav that are not part of the core.
As I type this, I am using 21 plugins on my site. Some came as part of the install. But nearly a dozen I installed after the fact. It sounds complicated, but it is not.
Once again, the Admin panel makes this painless. Just as there is a Theme section, there is a Plugins section. And similar to the Theme section, you can see which plugins are currently installed/active, set parameters for and activate/deactivate any of the installed plugins, and click an [+Add] button and be taken to a whole list of available plugins online that you can download into your site.
admin_panel_plugins_add
As just an example, I am currently using the Feed plugin to handle the ATOM/RSS feeds for my blog, the Git Sync plugin to keep my Grav site synced to a GitHub repo, and the Taxonomy plugin to generate lists of tags used in my blog, among others.
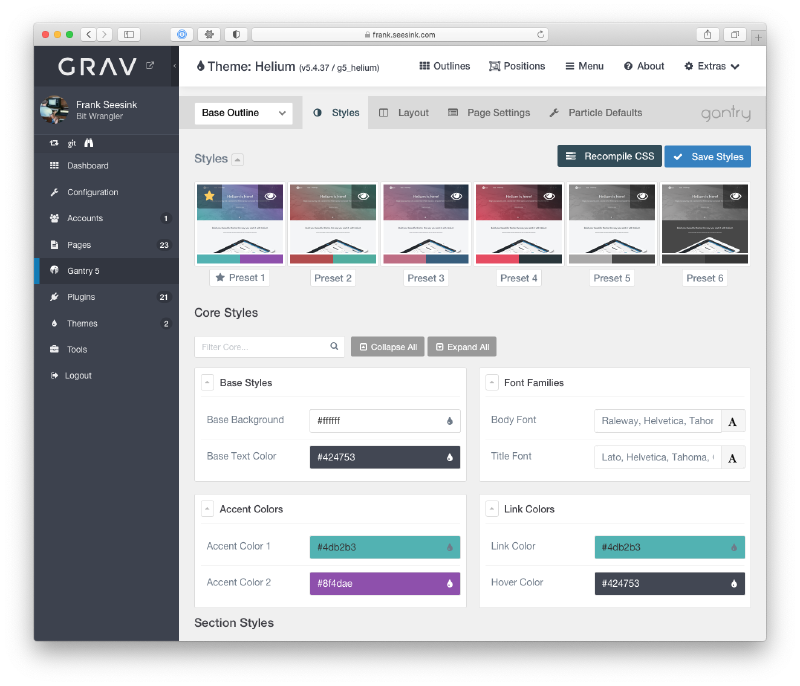
One of the more unique theme-related offerings out there is Gantry 5. A “next generation theme framework” developed by the folks behind Grav, Gantry 5 is not just a theme. Nor is it just a plugin. It is both! More importantly, Gantry 5 is not restricted to Grav. You can use Gantry 5 with Joomla and WordPress sites as well, and it functions the same.
The easiest way to start working with Gantry 5 is to go to the Admin panel Themes section, click [+Add], and search for either Hydrogen or Helium. As of this writing, these are the two free Gantry 5 themes (there are other, paid offerings). In the end, you install both a theme and the Gantry 5 plugin. When you install the Ganty 5 plugin, a new entry appears in the Admin panel. This is where you do all your work.
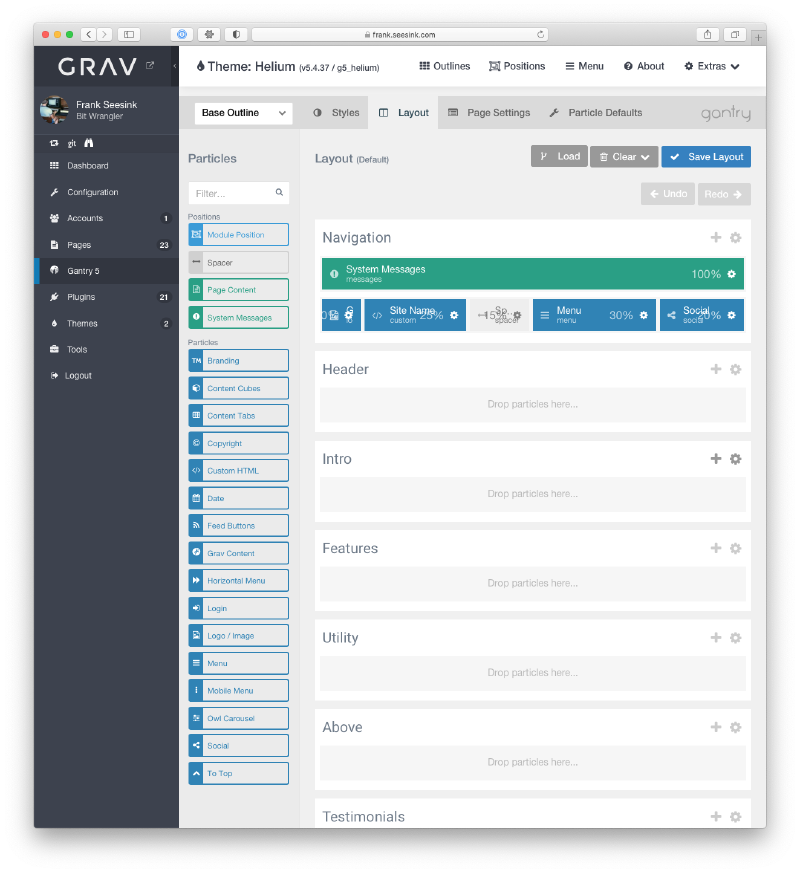
Once installed, you can begin using the layout editor to structure templates such as the Base Outline:
admin_panel_gantry_5_layout
For each outline, you can adjust page settings:
admin_panel_gantry_5_page_settings
You can also define what they refer to as particles, which are a kind of data dictionary of sorts, storing little tidbits you use throughout the theme:
admin_panel_gantry_5_particle_defaults
This barely scratches the surface, as Gantry 5 lets you leverage inheritance, gives you fine-grained control over layout that is like using flexbox on steroids, and a good bit more. I have just begun tinkering with Gantry 5, but it takes layout to a whole different level. The challenge, as always, is that with such power comes a bit of complexity. Or at least the need to spend a bit of time to get your head around it all. But Gantry 5 is a very powerful framework that is worth looking into for those looking for more advanced features.
Regarding pages, themes, and plugins, I just want to touch on Twig.
Twig is a quick, optimized template engine for PHP. It is designed from the ground up to make creating templates easier on both the developer and the designer.
Its easy-to-follow syntax and straightforward processes make it a natural fit for anyone familiar with Smarty, Django, Jinja, Liquid, or Stencil.
– Grav Docs
From that same page here is a simple example (Twig uses the “double moustache” syntax of {{ var }} and {% command %}):
<!DOCTYPE html><html><head><title>All About Cookies</title></head><body> My name is {{ name|e }} and I love cookies.
My favorite flavors of cookies are:
<ul> {% for cookie in cookies %}
<li>{{ cookie.flavor|e }}</li> {% endfor %}
</ul><h1>Cookies are the best!</h1></body></html>
Twig gives you a templating engine with the ability to do basic logic, looping, and filtering to generate more sophisticated pages. I will not go into it, but know that it is there.
Themes are all built using Twig, and you can leverage this ability in your own pages. By default a new page is configured not to process Twig. However, you can adjust that for a given page by going to the Advanced tab, then under Overrides checking Twig next to Process.
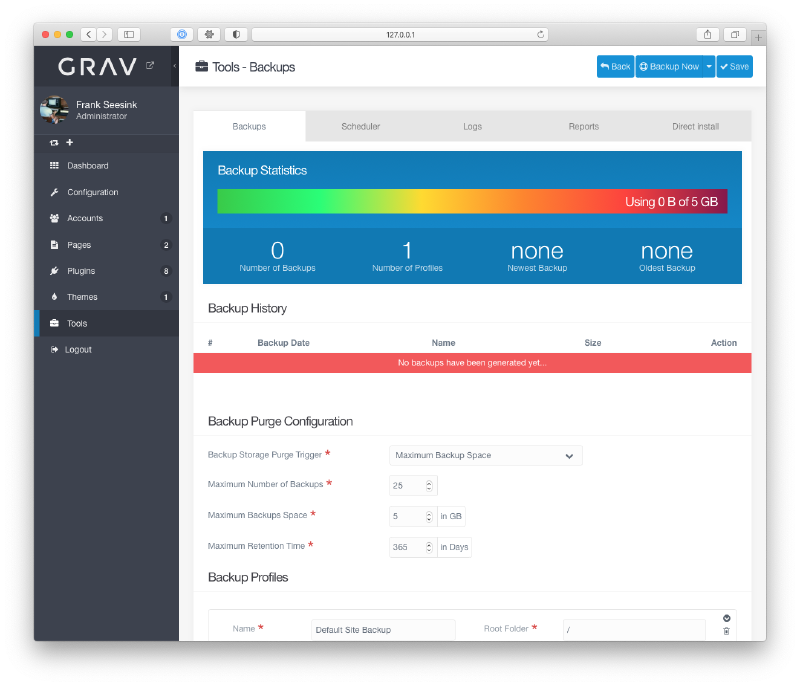
Last but not least, the Admin panel offers various tools to help manage your site, starting with backups. With one click, you can backup your entire Grav site. This is a .zip file of the entire site, front to back. That includes content you created, along with the Grav core and any plugins, themes, etc. If you take this .zip file and copy it to another webserver and decompress it, you should have a fully functioning site.
Now you can do manual backups, or you can schedule them to run at given times. When you do a manual backup, it is a one click affair. The Scheduler is where you setup cron jobs to run on the webserver. And while the backups will be stored on the webserver itself, when you do a manual backup, it offers to let you download that backup the moment it is done. Of course, you can simply download any of the backups in the backup history as well at any time.
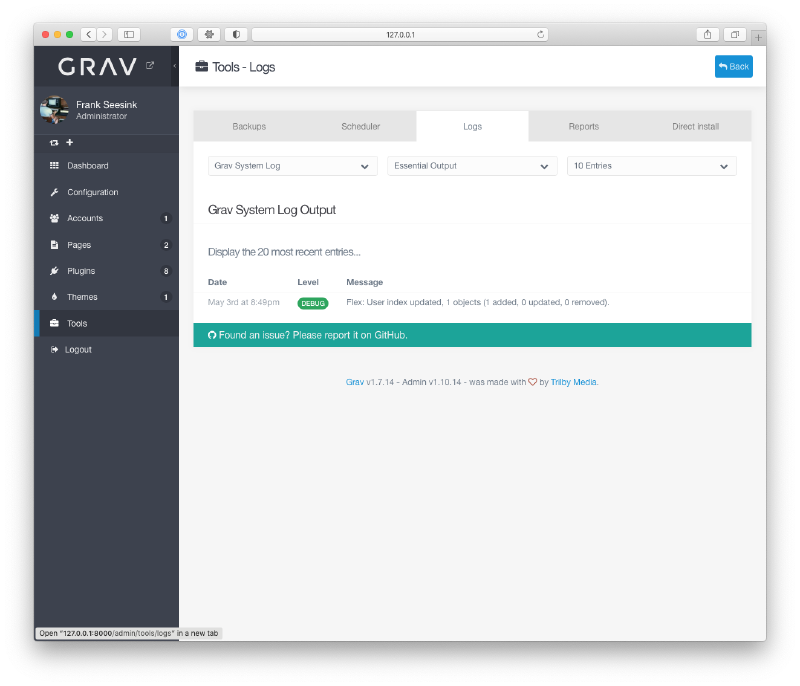
The Tools section also gives you access to Logs, which can help you sort through any issues which arise.
admin_panel_tools_logs
The Reports tab shows various checks which are run against your site. This lets you know if there is an issue that needs to be addressed.
Overall, I like Grav. I am enjoying working with it and learning to use it. I am sure I will keep finding little tidbits here and there. And even while I wrote this post I learned a few things. For example, the variety of Image Actions built into Grav is incredible. I made use of some of them to crop or otherwise adjust some of the screenshots I used as it was faster than having to bring them up in a graphics editor and actually edit them.
Now is Grav for everyone? Absolutely not. For most folks, a hosted WordPress instance may well suit them better. There are far more books, tutorials, YouTube videos, etc., about WordPress, and so the odds of finding something to get you through the learning curve is quite high. There are also more plugins for WordPress than likely any other CMS out there.
For others Weebly may suit their needs. Or Squarespace. To each their own.
But for me, I have yet to be disappointed with my decision. My content is under my control. It is easy to edit and search. I can back it up and restore it elsewhere. I can even spin up my site locally using the aforementioned php -S command. This could be handy if, for example, I wanted to edit pages on my laptop while otherwise disconnected from the Internet (e.g., on an international flight, lying on the deck of a cruise ship in the middle of the Atlantic, or just offline to avoid all the distractions). Of course, I could also just use Git for that as well.
Pages render well in both desktop and mobile browsers. And I can use (and have used) the Admin panel from my phone. Mind you, I would not type a lot on my phone. But the fact I can pull out my phone to make a quick edit to fix a typo, or to simply create a page with a note to myself for any ideas I come up with, is very handy. I also find the editor is quick/nimble, and I never find that I am waiting on it.
And I do not feel that I am locking myself into anything, not hosting-wise, software-wise, file format-wise, or otherwise. For me this matters.
We will see in another year or so how I feel, once I have had time to truly hammer on this a bit. But for now, this is the CMS for me.